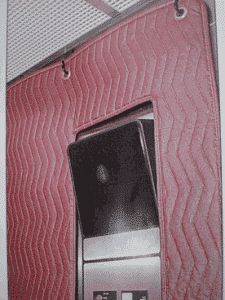
 The decision to purchase elevator pads is both sensible and forward-thinking. From wall panels to floor, and everything in between, the interior elements of an elevator cab can be expensive to repair. Elevator pads ensure wall panels, handrails, and other pieces of décor stay protected during the transportation of heavy freight and cargo. Ordering a set of custom elevator pads is easy; Eagle Mat offers a free Measurement Guide and instructional video that makes measuring and ordering elevator pads straightforward. Simply visit our Elevator Pads Online Store to print your free Measurement Guide & view our instructional video. After receiving your custom elevator pads, you will need to install studs in the wall panels of the elevator cab from which the pads will hang. This guide has been created to help facility owners and managers do just that.
Wall Pads 101: Installing Wall Studs in Elevator Wall Panels
Wall studs are the cylindrical posts from which elevator pads are hung. Properly installing wall studs is critical, as they will have an impact on how the elevator pad hangs and protects the elevator cab. The two most important things to keep in mind are spacing and alignment.
Spacing: Wall studs must be spaced according to the grommet holes in the pads themselves, effectively aligning with the grommet holes with the wall studs so the pad may be hung in a taught fashion from left to right.
Alignment: Wall studs must be embedded in a straight line across the elevator wall panel. This will ensure the pad hangs in a straight line, parallel to the floor.
What You Will Need:
1. At least 2 people
2. Step Ladder
3. Sharpie Marker
4. Level
5. Awl
6. Hammer
7. Electric Drill (with Charger)
8. 9/64″ Split Point Titanium Drill Bit (multiple bits)
9. Rag
10. Vice Grip (preferred over a Wrench or Pliers)
Steps for Installing the Pads:
1. Have someone hold a wall pad in place, while the other person marks a tiny dot with the Sharpie marker on the metal wall in the center of the grommet hole. (Do this for all grommet holes on the pad).
2. Take the level and make sure that all of the dots are in a perfectly straight line.
3. Make sure there is an (approximate) equal spacing “gap” in the far left and right corners of the wall.
4. Place the point of the awl on the marked dot and use the hammer to create an indent in the metal. Note: Avoid hitting the panel too hard and don’t make too big of an indent. Rather, mark the panel just enough so that the drill bit has a place to rest and not move.
5. Place the drill bit into the indent and continue to firmly press the drill into the indent while drilling to create a hole. Note: Start from the inside grommet holes and move outward so the pads can be hung as you move from one whole to the next, making sure everything is in line.
6. Take the stud and screw it into the hole as much as possible by hand.
7. When you can’t screw it in anymore by hand, take the rag and wrap it around the stud (to prevent any scratching on the stud itself). Next take the vice grip and clamp it onto the end of the stud.
8. Once the vice grip is properly secured, continue to screw the stud until it is fully screwed into the wall.
9. Repeat steps #1-8 for all panels and studs.
10. Once all of the studs are installed, hang the full pad.
Special Notes:
1. To install Self-Tapping Screw (#8 above) into the metal surface of an elevator wall, use a 9/64″ Split Point Titanium Drill Bit as the split tip will reduce walking.
2. A Self-Tapping Screw (#8 above) needs a 9/64″ drill bit.
3. Each drill bit will only be sharp enough to drill 2-3 holes into the metal walls.
Contact Eagle Mat for Elevator Pad Consultation
Visit the Eagle Mat Elevator Pads Online Store for additional information regarding the measurement, ordering, and installation of custom protective pads. Our customer service representatives are available to assist in ordering. Simply contact Eagle Mat online or call toll free 1-877-333-1018.


